![[Updated] Capture Brilliance Essential Lighting Hacks for IPhone](https://thmb.techidaily.com/7fab9a6185158d097b206408c1b02e98fd2b514b00431bdf0c9ec5881d711d0e.jpg)
"[Updated] Capture Brilliance Essential Lighting Hacks for IPhone"
Capture Brilliance: Essential Lighting Hacks for IPhone
iPhone Photography Lighting Tips
 Forex Robotron Basic Package
Ollie Mattison
Mar 27, 2024• Proven solutions
Photography derives its name from two ancient Greek words, photos, which means light and graphé which means drawing, so in its original sense to snap a photo of something is actually the act of drawing with light. How we use the light on our pictures is what makes these images unique and different from others, which is the reason why it is important to know which types of natural and artificial lights can help you improve the quality of your iPhone photos.
Being a photographer means that you must be able to use light to your own advantage and play with it to get better results, so in this article we are going to take you through a lot of different types of light and we are going to provide you with useful tips on how to use light in your photos.
iPhone Photography Lighting Tips
Tips for Outdoor iPhone Photographers
1. Golden hour: Diffused light is much more pleasant for taking photos and the softest natural light can be found during the sunrise and sunset. The hour before the sun sets or rises is called the golden hour and it is one of the best times of the day for photography in terms of the quality of light that is available. Colors on photos taken during the golden hour appear warm and pictures have a lot of red, yellow or orange due to the low position of the sun on the horizon. Sunrise and sunset are also a perfect time of the day to capture silhouette photos or breathtaking landscapes.

Image resource: Constractly
Anyone who has seen a photo of a sunset knows how light during the golden hour looks like, but being able to capture such beautiful light requires you to use your iPhone as a photo camera frequently. If you constantly take pictures early in the morning or just before sunset you’ll be able to take your iPhone photography a step further.
2. Blue hour: Around half an hour before the night ends or after the sunset there is still enough light to shoot amazing photos. During that narrow period of time, you can create stunning city vistas because the artificial light of metropolises creates a contrast to the sky in the background. The light during the blue hour is colder, which is why photos taken during the period tend to have more blues and greens.

Holding your phone in your hand while taking pictures during the blue hour may result in blurry photos because you have to set longer exposures in order to ensure your camera is getting enough light. Placing your iPhone on a tripod or on a surface on which it will be perfectly stable, will enable you to produce razor-sharp images with a lot of blue hour light.
3. Midday: One hour before and after the noon and the Sun is at its highest point, which means that during this period of the day it provides the most light. The type of light the Sun produces at this time of the day is called direct light, that is much less diffused than the light in the morning. Even though there is enough light to take pictures while holding your iPhone, too much light can also create problems if you are using automatic settings.

Image resource: flickr
The abundance of light puts you at risk of overexposing parts of your photo, and for that reason it is better to set the ISO, Aperture and Exposure values manually, using some of the iOS apps that enable you to control your iPhone camera settings. The direct light produces a strong contrast between light and shadow, that can create a great rhythm on a photo.
4. Cloudy sky: Clouds can be photographer’s best friend and his or her’s worst enemy. A cloudy gray sky generates all sorts of problems to cameras because it is often much brighter than the rest of the scene. On the other hand, a blue sky with fluffy white clouds looks like the perfect background for a photo. This is a great example of how much outdoor photography depends on good weather conditions.
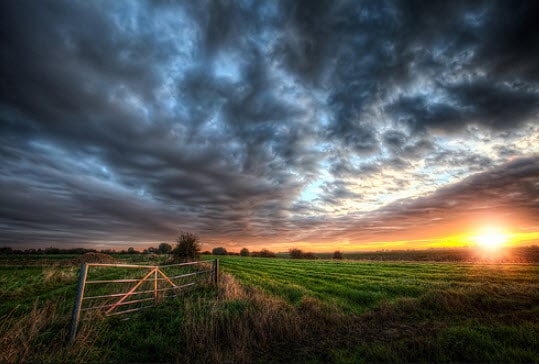
Image resource: Digital Photo Secrets
Cloudy gray days allow you to take better black and white photos because the scenes you can take photos of, don’t have too much color. Monochrome photos are easier to take because unlike with color photos you only have to work with blacks and whites.
Color photos of a cloudy sky look better if the sky is clear and there are only a few cloud formations in the shot, and if you want to take photos of clouds you just have to be careful not to use zoom too much.
5. Mist and Fog: Mist or fog has a tendency to diffuse light which makes the light more pleasant to the human eye, but the reduced visibility complicates taking pictures for a number of reasons. A great photo always depends on a good moment, so in order to make good use of mist, you have to be at a right location and at a right time. Early morning is the best time to experiment with light softened by fog because usually there is enough light so you can capture sunbeams as they fall on the scene before you.
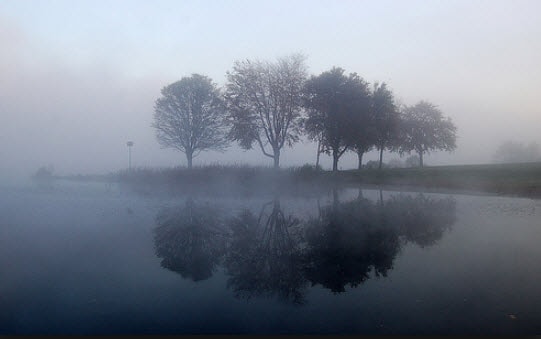
Image resource: Digital Photo Secrets
As rewarding as they may be, mist creates a lot of problems for iPhone photographers, because finding a focus point is more difficult than it is under normal light conditions. The light you can capture through the mist is truly magical, but it is often difficult to come across this type of light.
6. Backlight: Commonly, photos receive most of the light from the light that falls from the front, but when the light falls from the back of the photo’s subject that means that the picture is backlit. The best example of the backlit photo is a silhouette photo, because most of the light in the photo comes from the source located behind the subject of a photo, thus making it possible to create a silhouette of a figure.
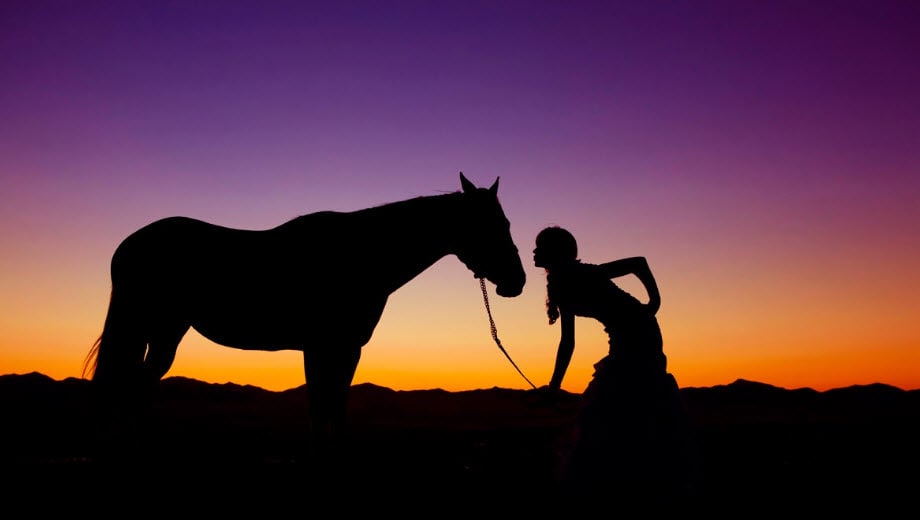
Image resource: Google
All you need to do in order to capitalize on backlight is to place the subject of the photo between the iPhone camera and a source of light. The light that’s coming directly towards camera will force you to reduce the camera’s exposure, which will create a dark figure on your photo. If you want to take great backlit photos, you need to learn how to use sources of light you have at your disposal. Use anything you can find, shop windows, street lamps or anything else that can help you take a better photo.
7. Artificial light at night: Long exposure photography is an art that takes time to master, but being patient and willing to learn all its tricks will improve your photo taking skills. Using an artificial light at night can help you avoid using flash or tripods while taking photos with an iPhone. Even if there is a lot of artificial light in the scene you want to photograph, the stability of your camera should be your main concern because even the smallest camera shake can easily blur the photo.

WPS Office Premium ( File Recovery, Photo Scanning, Convert PDF)–Yearly
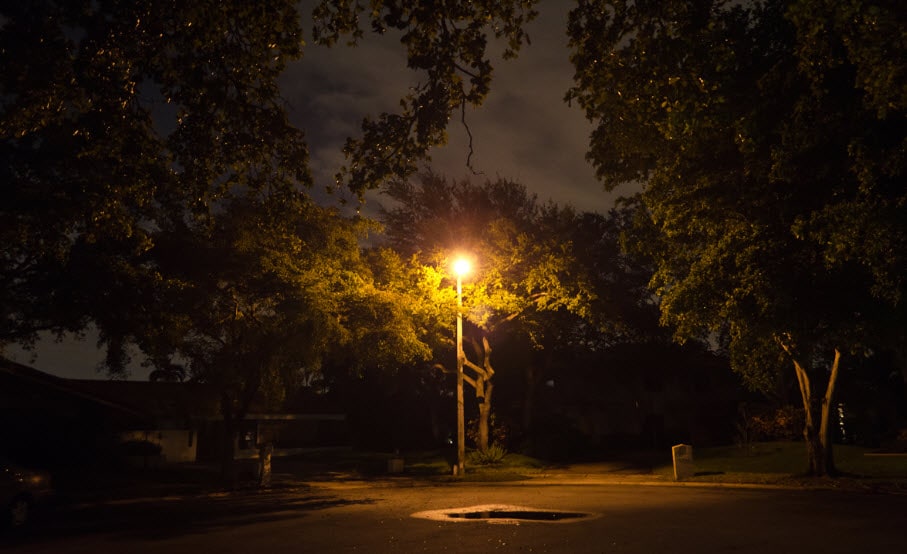
Image resource: Efram Goldberg Photography
Rain creates reflections of artificial light on the streets at night, which is why if you like night photography, taking pictures at night after the rain is one of the best times for long exposure pictures. iPhones can capture amazing night shots, but they do need additional photo equipment to achieve their best results.
 PDF application, powered by AI-based OCR, for unified workflows with both digital and scanned documents.
 Watch Video! Tips for Taking Photos on iPhone in Different Lighting

Tips for Indoor iPhone Photography Sessions
Indoor photography often includes the use of artificial light, but during the day iPhone photographers can also take advantage of the light that comes through the windows. The light that falls at an angle produces shadows that add a sense of depth to the photo, thus creating an opportunity to take an artistic photo indoors.
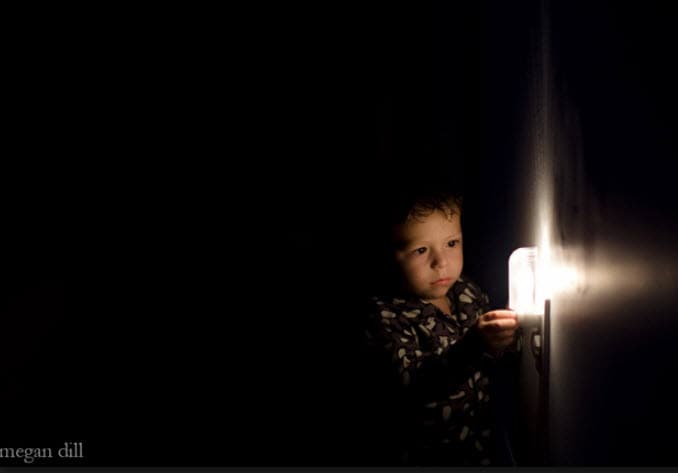
However, artificial sources of light are usually a better option if you want to take interior photos since the natural sources of light are scarce and unreliable. Using a flash on your iPhone is also an option but its strong light will completely change the light setting of the scene.
Ollie Mattison
Ollie Mattison is a writer and a lover of all things video.
Follow @Ollie Mattison
Ollie Mattison
Mar 27, 2024• Proven solutions
Photography derives its name from two ancient Greek words, photos, which means light and graphé which means drawing, so in its original sense to snap a photo of something is actually the act of drawing with light. How we use the light on our pictures is what makes these images unique and different from others, which is the reason why it is important to know which types of natural and artificial lights can help you improve the quality of your iPhone photos.
Being a photographer means that you must be able to use light to your own advantage and play with it to get better results, so in this article we are going to take you through a lot of different types of light and we are going to provide you with useful tips on how to use light in your photos.
 Allavsoft Batch Download Online Videos, Music Offline to MP4, MP3, MOV, etc format
iPhone Photography Lighting Tips

Tips for Outdoor iPhone Photographers
1. Golden hour: Diffused light is much more pleasant for taking photos and the softest natural light can be found during the sunrise and sunset. The hour before the sun sets or rises is called the golden hour and it is one of the best times of the day for photography in terms of the quality of light that is available. Colors on photos taken during the golden hour appear warm and pictures have a lot of red, yellow or orange due to the low position of the sun on the horizon. Sunrise and sunset are also a perfect time of the day to capture silhouette photos or breathtaking landscapes.
Image resource: Constractly
Anyone who has seen a photo of a sunset knows how light during the golden hour looks like, but being able to capture such beautiful light requires you to use your iPhone as a photo camera frequently. If you constantly take pictures early in the morning or just before sunset you’ll be able to take your iPhone photography a step further.
2. Blue hour: Around half an hour before the night ends or after the sunset there is still enough light to shoot amazing photos. During that narrow period of time, you can create stunning city vistas because the artificial light of metropolises creates a contrast to the sky in the background. The light during the blue hour is colder, which is why photos taken during the period tend to have more blues and greens.
Holding your phone in your hand while taking pictures during the blue hour may result in blurry photos because you have to set longer exposures in order to ensure your camera is getting enough light. Placing your iPhone on a tripod or on a surface on which it will be perfectly stable, will enable you to produce razor-sharp images with a lot of blue hour light.
3. Midday: One hour before and after the noon and the Sun is at its highest point, which means that during this period of the day it provides the most light. The type of light the Sun produces at this time of the day is called direct light, that is much less diffused than the light in the morning. Even though there is enough light to take pictures while holding your iPhone, too much light can also create problems if you are using automatic settings.
 The BootIt Collection covers multi-booting, partitioning, and disk imaging on traditional PC’s using the standard BIOS and newer PC’s using UEFI. The collection includes BootIt Bare Metal (BIBM) for standard BIOS systems and BootIt UEFI (BIU) for UEFI system.
Image resource: flickr
The abundance of light puts you at risk of overexposing parts of your photo, and for that reason it is better to set the ISO, Aperture and Exposure values manually, using some of the iOS apps that enable you to control your iPhone camera settings. The direct light produces a strong contrast between light and shadow, that can create a great rhythm on a photo.
4. Cloudy sky: Clouds can be photographer’s best friend and his or her’s worst enemy. A cloudy gray sky generates all sorts of problems to cameras because it is often much brighter than the rest of the scene. On the other hand, a blue sky with fluffy white clouds looks like the perfect background for a photo. This is a great example of how much outdoor photography depends on good weather conditions.
 Power Tools add-on for Google Sheets, 12-month subscription
Image resource: Digital Photo Secrets
Cloudy gray days allow you to take better black and white photos because the scenes you can take photos of, don’t have too much color. Monochrome photos are easier to take because unlike with color photos you only have to work with blacks and whites.
Color photos of a cloudy sky look better if the sky is clear and there are only a few cloud formations in the shot, and if you want to take photos of clouds you just have to be careful not to use zoom too much.
5. Mist and Fog: Mist or fog has a tendency to diffuse light which makes the light more pleasant to the human eye, but the reduced visibility complicates taking pictures for a number of reasons. A great photo always depends on a good moment, so in order to make good use of mist, you have to be at a right location and at a right time. Early morning is the best time to experiment with light softened by fog because usually there is enough light so you can capture sunbeams as they fall on the scene before you.
Image resource: Digital Photo Secrets
As rewarding as they may be, mist creates a lot of problems for iPhone photographers, because finding a focus point is more difficult than it is under normal light conditions. The light you can capture through the mist is truly magical, but it is often difficult to come across this type of light.
6. Backlight: Commonly, photos receive most of the light from the light that falls from the front, but when the light falls from the back of the photo’s subject that means that the picture is backlit. The best example of the backlit photo is a silhouette photo, because most of the light in the photo comes from the source located behind the subject of a photo, thus making it possible to create a silhouette of a figure.
Image resource: Google
All you need to do in order to capitalize on backlight is to place the subject of the photo between the iPhone camera and a source of light. The light that’s coming directly towards camera will force you to reduce the camera’s exposure, which will create a dark figure on your photo. If you want to take great backlit photos, you need to learn how to use sources of light you have at your disposal. Use anything you can find, shop windows, street lamps or anything else that can help you take a better photo.
7. Artificial light at night: Long exposure photography is an art that takes time to master, but being patient and willing to learn all its tricks will improve your photo taking skills. Using an artificial light at night can help you avoid using flash or tripods while taking photos with an iPhone. Even if there is a lot of artificial light in the scene you want to photograph, the stability of your camera should be your main concern because even the smallest camera shake can easily blur the photo.
Image resource: Efram Goldberg Photography
Rain creates reflections of artificial light on the streets at night, which is why if you like night photography, taking pictures at night after the rain is one of the best times for long exposure pictures. iPhones can capture amazing night shots, but they do need additional photo equipment to achieve their best results.
Watch Video! Tips for Taking Photos on iPhone in Different Lighting
Tips for Indoor iPhone Photography Sessions
Indoor photography often includes the use of artificial light, but during the day iPhone photographers can also take advantage of the light that comes through the windows. The light that falls at an angle produces shadows that add a sense of depth to the photo, thus creating an opportunity to take an artistic photo indoors.
However, artificial sources of light are usually a better option if you want to take interior photos since the natural sources of light are scarce and unreliable. Using a flash on your iPhone is also an option but its strong light will completely change the light setting of the scene.
Ollie Mattison
Ollie Mattison is a writer and a lover of all things video.
Follow @Ollie Mattison
Ollie Mattison
Mar 27, 2024• Proven solutions
Photography derives its name from two ancient Greek words, photos, which means light and graphé which means drawing, so in its original sense to snap a photo of something is actually the act of drawing with light. How we use the light on our pictures is what makes these images unique and different from others, which is the reason why it is important to know which types of natural and artificial lights can help you improve the quality of your iPhone photos.
Being a photographer means that you must be able to use light to your own advantage and play with it to get better results, so in this article we are going to take you through a lot of different types of light and we are going to provide you with useful tips on how to use light in your photos.
iPhone Photography Lighting Tips
Tips for Outdoor iPhone Photographers
1. Golden hour: Diffused light is much more pleasant for taking photos and the softest natural light can be found during the sunrise and sunset. The hour before the sun sets or rises is called the golden hour and it is one of the best times of the day for photography in terms of the quality of light that is available. Colors on photos taken during the golden hour appear warm and pictures have a lot of red, yellow or orange due to the low position of the sun on the horizon. Sunrise and sunset are also a perfect time of the day to capture silhouette photos or breathtaking landscapes.
Image resource: Constractly
Anyone who has seen a photo of a sunset knows how light during the golden hour looks like, but being able to capture such beautiful light requires you to use your iPhone as a photo camera frequently. If you constantly take pictures early in the morning or just before sunset you’ll be able to take your iPhone photography a step further.
2. Blue hour: Around half an hour before the night ends or after the sunset there is still enough light to shoot amazing photos. During that narrow period of time, you can create stunning city vistas because the artificial light of metropolises creates a contrast to the sky in the background. The light during the blue hour is colder, which is why photos taken during the period tend to have more blues and greens.
Holding your phone in your hand while taking pictures during the blue hour may result in blurry photos because you have to set longer exposures in order to ensure your camera is getting enough light. Placing your iPhone on a tripod or on a surface on which it will be perfectly stable, will enable you to produce razor-sharp images with a lot of blue hour light.
3. Midday: One hour before and after the noon and the Sun is at its highest point, which means that during this period of the day it provides the most light. The type of light the Sun produces at this time of the day is called direct light, that is much less diffused than the light in the morning. Even though there is enough light to take pictures while holding your iPhone, too much light can also create problems if you are using automatic settings.
Image resource: flickr
The abundance of light puts you at risk of overexposing parts of your photo, and for that reason it is better to set the ISO, Aperture and Exposure values manually, using some of the iOS apps that enable you to control your iPhone camera settings. The direct light produces a strong contrast between light and shadow, that can create a great rhythm on a photo.
4. Cloudy sky: Clouds can be photographer’s best friend and his or her’s worst enemy. A cloudy gray sky generates all sorts of problems to cameras because it is often much brighter than the rest of the scene. On the other hand, a blue sky with fluffy white clouds looks like the perfect background for a photo. This is a great example of how much outdoor photography depends on good weather conditions.
Image resource: Digital Photo Secrets
Cloudy gray days allow you to take better black and white photos because the scenes you can take photos of, don’t have too much color. Monochrome photos are easier to take because unlike with color photos you only have to work with blacks and whites.
Color photos of a cloudy sky look better if the sky is clear and there are only a few cloud formations in the shot, and if you want to take photos of clouds you just have to be careful not to use zoom too much.
5. Mist and Fog: Mist or fog has a tendency to diffuse light which makes the light more pleasant to the human eye, but the reduced visibility complicates taking pictures for a number of reasons. A great photo always depends on a good moment, so in order to make good use of mist, you have to be at a right location and at a right time. Early morning is the best time to experiment with light softened by fog because usually there is enough light so you can capture sunbeams as they fall on the scene before you.
Image resource: Digital Photo Secrets
As rewarding as they may be, mist creates a lot of problems for iPhone photographers, because finding a focus point is more difficult than it is under normal light conditions. The light you can capture through the mist is truly magical, but it is often difficult to come across this type of light.
6. Backlight: Commonly, photos receive most of the light from the light that falls from the front, but when the light falls from the back of the photo’s subject that means that the picture is backlit. The best example of the backlit photo is a silhouette photo, because most of the light in the photo comes from the source located behind the subject of a photo, thus making it possible to create a silhouette of a figure.
Image resource: Google
All you need to do in order to capitalize on backlight is to place the subject of the photo between the iPhone camera and a source of light. The light that’s coming directly towards camera will force you to reduce the camera’s exposure, which will create a dark figure on your photo. If you want to take great backlit photos, you need to learn how to use sources of light you have at your disposal. Use anything you can find, shop windows, street lamps or anything else that can help you take a better photo.
7. Artificial light at night: Long exposure photography is an art that takes time to master, but being patient and willing to learn all its tricks will improve your photo taking skills. Using an artificial light at night can help you avoid using flash or tripods while taking photos with an iPhone. Even if there is a lot of artificial light in the scene you want to photograph, the stability of your camera should be your main concern because even the smallest camera shake can easily blur the photo.
Image resource: Efram Goldberg Photography
Rain creates reflections of artificial light on the streets at night, which is why if you like night photography, taking pictures at night after the rain is one of the best times for long exposure pictures. iPhones can capture amazing night shots, but they do need additional photo equipment to achieve their best results.
Watch Video! Tips for Taking Photos on iPhone in Different Lighting

Tips for Indoor iPhone Photography Sessions
Indoor photography often includes the use of artificial light, but during the day iPhone photographers can also take advantage of the light that comes through the windows. The light that falls at an angle produces shadows that add a sense of depth to the photo, thus creating an opportunity to take an artistic photo indoors.
However, artificial sources of light are usually a better option if you want to take interior photos since the natural sources of light are scarce and unreliable. Using a flash on your iPhone is also an option but its strong light will completely change the light setting of the scene.
Ollie Mattison
Ollie Mattison is a writer and a lover of all things video.
Follow @Ollie Mattison
Ollie Mattison
Mar 27, 2024• Proven solutions
Photography derives its name from two ancient Greek words, photos, which means light and graphé which means drawing, so in its original sense to snap a photo of something is actually the act of drawing with light. How we use the light on our pictures is what makes these images unique and different from others, which is the reason why it is important to know which types of natural and artificial lights can help you improve the quality of your iPhone photos.
Being a photographer means that you must be able to use light to your own advantage and play with it to get better results, so in this article we are going to take you through a lot of different types of light and we are going to provide you with useful tips on how to use light in your photos.
iPhone Photography Lighting Tips
Tips for Outdoor iPhone Photographers
1. Golden hour: Diffused light is much more pleasant for taking photos and the softest natural light can be found during the sunrise and sunset. The hour before the sun sets or rises is called the golden hour and it is one of the best times of the day for photography in terms of the quality of light that is available. Colors on photos taken during the golden hour appear warm and pictures have a lot of red, yellow or orange due to the low position of the sun on the horizon. Sunrise and sunset are also a perfect time of the day to capture silhouette photos or breathtaking landscapes.

Image resource: Constractly
Anyone who has seen a photo of a sunset knows how light during the golden hour looks like, but being able to capture such beautiful light requires you to use your iPhone as a photo camera frequently. If you constantly take pictures early in the morning or just before sunset you’ll be able to take your iPhone photography a step further.
2. Blue hour: Around half an hour before the night ends or after the sunset there is still enough light to shoot amazing photos. During that narrow period of time, you can create stunning city vistas because the artificial light of metropolises creates a contrast to the sky in the background. The light during the blue hour is colder, which is why photos taken during the period tend to have more blues and greens.
Holding your phone in your hand while taking pictures during the blue hour may result in blurry photos because you have to set longer exposures in order to ensure your camera is getting enough light. Placing your iPhone on a tripod or on a surface on which it will be perfectly stable, will enable you to produce razor-sharp images with a lot of blue hour light.
3. Midday: One hour before and after the noon and the Sun is at its highest point, which means that during this period of the day it provides the most light. The type of light the Sun produces at this time of the day is called direct light, that is much less diffused than the light in the morning. Even though there is enough light to take pictures while holding your iPhone, too much light can also create problems if you are using automatic settings.
 WinUtilities Pro
Image resource: flickr
The abundance of light puts you at risk of overexposing parts of your photo, and for that reason it is better to set the ISO, Aperture and Exposure values manually, using some of the iOS apps that enable you to control your iPhone camera settings. The direct light produces a strong contrast between light and shadow, that can create a great rhythm on a photo.
4. Cloudy sky: Clouds can be photographer’s best friend and his or her’s worst enemy. A cloudy gray sky generates all sorts of problems to cameras because it is often much brighter than the rest of the scene. On the other hand, a blue sky with fluffy white clouds looks like the perfect background for a photo. This is a great example of how much outdoor photography depends on good weather conditions.
 Nero Burning ROM:
The ultimate burning program for all your needs!
Image resource: Digital Photo Secrets
Cloudy gray days allow you to take better black and white photos because the scenes you can take photos of, don’t have too much color. Monochrome photos are easier to take because unlike with color photos you only have to work with blacks and whites.
Color photos of a cloudy sky look better if the sky is clear and there are only a few cloud formations in the shot, and if you want to take photos of clouds you just have to be careful not to use zoom too much.
5. Mist and Fog: Mist or fog has a tendency to diffuse light which makes the light more pleasant to the human eye, but the reduced visibility complicates taking pictures for a number of reasons. A great photo always depends on a good moment, so in order to make good use of mist, you have to be at a right location and at a right time. Early morning is the best time to experiment with light softened by fog because usually there is enough light so you can capture sunbeams as they fall on the scene before you.
Image resource: Digital Photo Secrets
As rewarding as they may be, mist creates a lot of problems for iPhone photographers, because finding a focus point is more difficult than it is under normal light conditions. The light you can capture through the mist is truly magical, but it is often difficult to come across this type of light.
6. Backlight: Commonly, photos receive most of the light from the light that falls from the front, but when the light falls from the back of the photo’s subject that means that the picture is backlit. The best example of the backlit photo is a silhouette photo, because most of the light in the photo comes from the source located behind the subject of a photo, thus making it possible to create a silhouette of a figure.
 Power Tools add-on for Google Sheets, Lifetime subscription
Image resource: Google
All you need to do in order to capitalize on backlight is to place the subject of the photo between the iPhone camera and a source of light. The light that’s coming directly towards camera will force you to reduce the camera’s exposure, which will create a dark figure on your photo. If you want to take great backlit photos, you need to learn how to use sources of light you have at your disposal. Use anything you can find, shop windows, street lamps or anything else that can help you take a better photo.
7. Artificial light at night: Long exposure photography is an art that takes time to master, but being patient and willing to learn all its tricks will improve your photo taking skills. Using an artificial light at night can help you avoid using flash or tripods while taking photos with an iPhone. Even if there is a lot of artificial light in the scene you want to photograph, the stability of your camera should be your main concern because even the smallest camera shake can easily blur the photo.
Image resource: Efram Goldberg Photography
Rain creates reflections of artificial light on the streets at night, which is why if you like night photography, taking pictures at night after the rain is one of the best times for long exposure pictures. iPhones can capture amazing night shots, but they do need additional photo equipment to achieve their best results.

Watch Video! Tips for Taking Photos on iPhone in Different Lighting
Tips for Indoor iPhone Photography Sessions
Indoor photography often includes the use of artificial light, but during the day iPhone photographers can also take advantage of the light that comes through the windows. The light that falls at an angle produces shadows that add a sense of depth to the photo, thus creating an opportunity to take an artistic photo indoors.
However, artificial sources of light are usually a better option if you want to take interior photos since the natural sources of light are scarce and unreliable. Using a flash on your iPhone is also an option but its strong light will completely change the light setting of the scene.

Ollie Mattison
Ollie Mattison is a writer and a lover of all things video.
Follow @Ollie Mattison
- Title: [Updated] Capture Brilliance Essential Lighting Hacks for IPhone
- Author: Christopher
- Created at : 2024-07-22 10:38:47
- Updated at : 2024-07-23 10:38:47
- Link: https://extra-hints.techidaily.com/updated-capture-brilliance-essential-lighting-hacks-for-iphone/
- License: This work is licensed under CC BY-NC-SA 4.0.