Enhancing Webcasts with Dynamic Background Transitions
Enhancing Webcasts with Dynamic Background Transitions
How to use Green Screen for Streaming


Richard Bennett
Oct 26, 2023• Proven solutions
The green screen has become the new hot-cake among gamers and other video streamers. It allows them to add the most magnetizing and unreal effects for their streams. These days, it has become easier than ever to set-up your green screen studio and creatively displays your hidden talent.
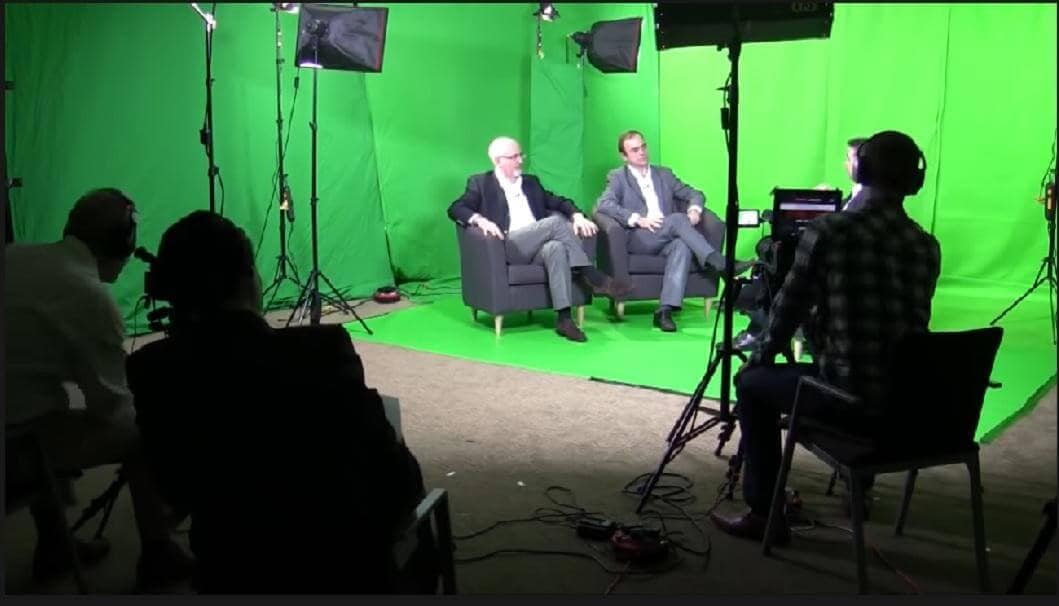
How to set-up your live streaming studio
To set up a green screen studio, there are some things you’ll need to be equipped with first. You’ll need to know which camera to use, which green screen to use, and which lights your broadcast requires.
There is a wide range of set-up options depending upon your need. If you are thinking about broadcasting from a newsroom, your set-up should match the requirements when it comes to the equipment.
In a studio, the camera should be specifically for high-quality live video transmissions. Green screen size should be considerable and so should be the number of lights. In addition to all that, you will also need a crew to set up a massive studio.
For personal video streaming the equipment you need should be basic but make sure it does not lag too much behind in quality. There are a lot of selections that allow you to set up everything singlehandedly.
The details of the needed equipment for different scenarios are explained below:
- Camera
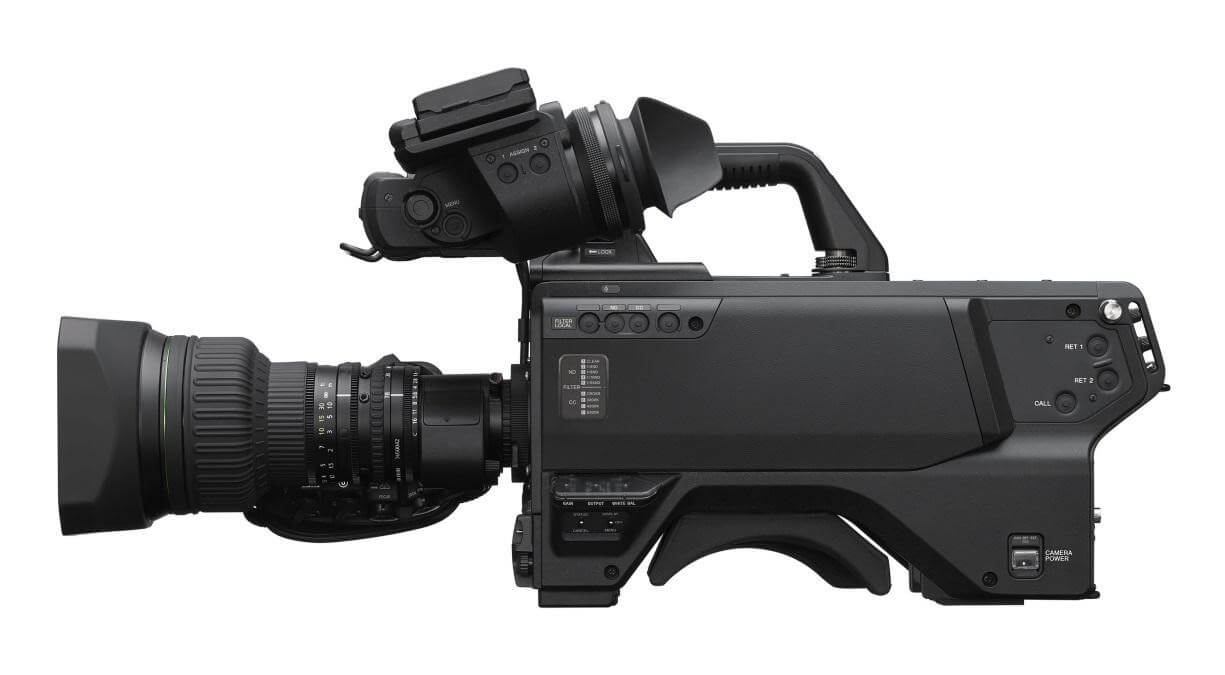
If you want to set up a large broadcasting studio the camera you’ll need should have adequate qualities. A live system studio and the broadcasting camera should do the trick if you have a sufficient budget. They can range anywhere from $2000 to $25000 depending on your need. A video with a quality of less than 2k resolution is not enough for streaming from a big newsroom studio.

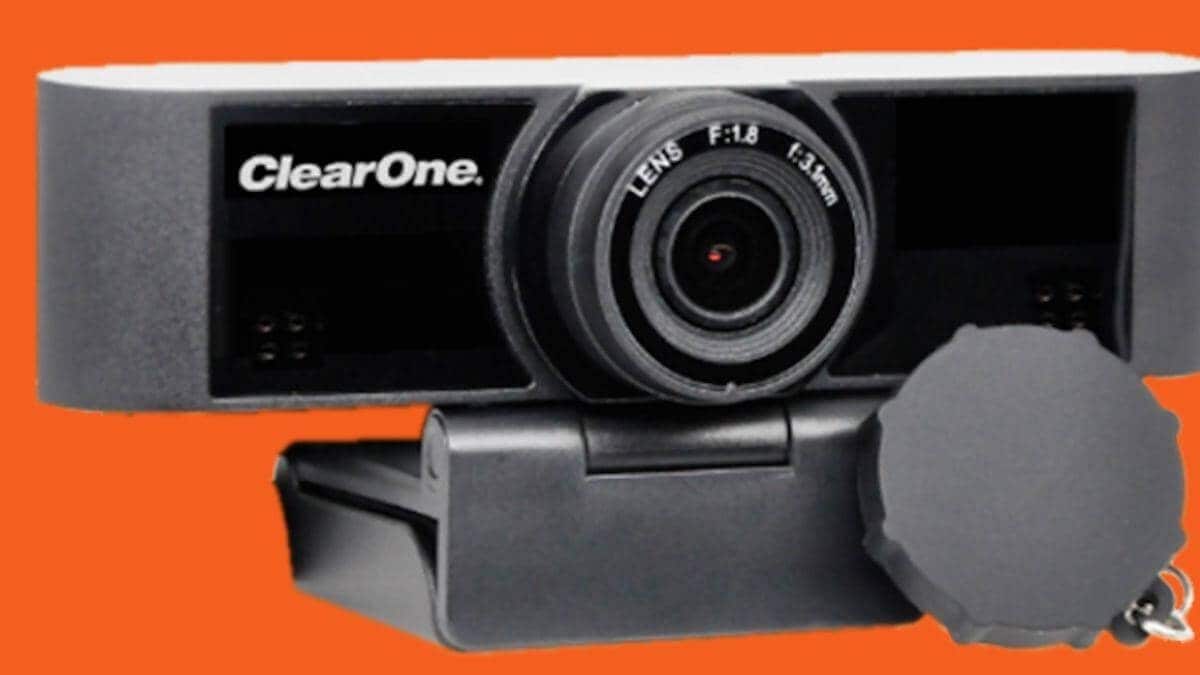
For normal web or twitch streaming a high-quality webcam should be used. It should have good face tracking and great picture quality. A 1080p resolution with the capability of 30-60 frames is a bonus. There are some great cameras on the market that you can even land at under $100.
- Green Screen
The green screen requirements are also different for different types of broadcasting. A large studio will need to have a hanging green screen big enough to cover the whole studio. Make sure that you clip them tightly enough at the corners that no wrinkles are left. Also, make sure any object you want to remove from the background should be wrapped in green, for example, the legs of green screen lights,
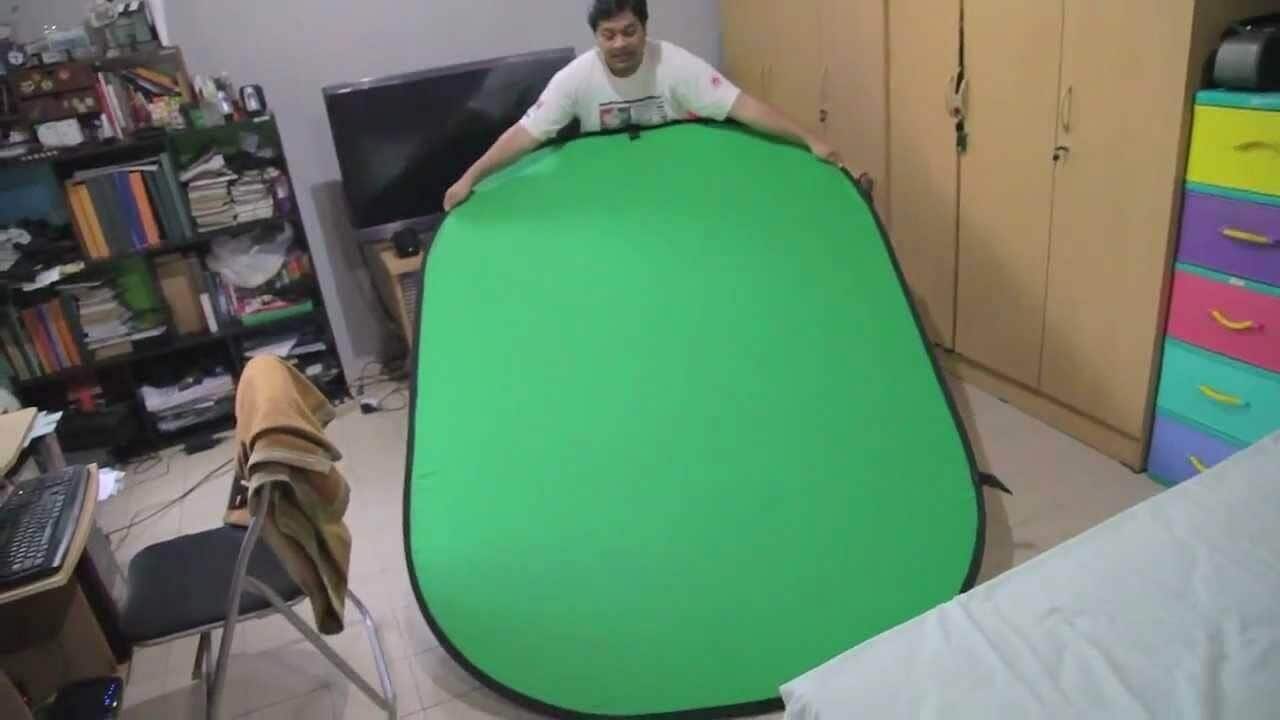
For gamers and other streamers like beauty vloggers, twitch anchors, and YouTubers there are different kinds of green screens in the market depending on the budget. There are foldable ones that can fold into a circle like a small tent. They open up to a considerably decent size. These green screens need to be hanged to keep them standing and come at a considerably lower price range of around $40.
Another option of the green screen for streamers is a collapsible green screen. It was introduced by Elgato and is easy to carry and easy to set-up. It can be adjusted to any height and can open and tear down in a matter of seconds. It comes with a relatively high price of around $150 but they are worth the money.
Do remember that any green screen you use should be large enough to give your main subject space to move around. Apart from that, make sure you don’t have any green elements in your subject or your software will also make those areas disappear. If your subject has blonde hair, a blue screen instead of a green screen is recommended.
 PCDJ DEX 3 for Windows & MAC is the total entertainment DJ software solution, offering audio, video, and karaoke mixing ability. Automatic beat-sync, smart looping, 4 decks, DJ MIDI controller support, Karaoke Streaming and much more.
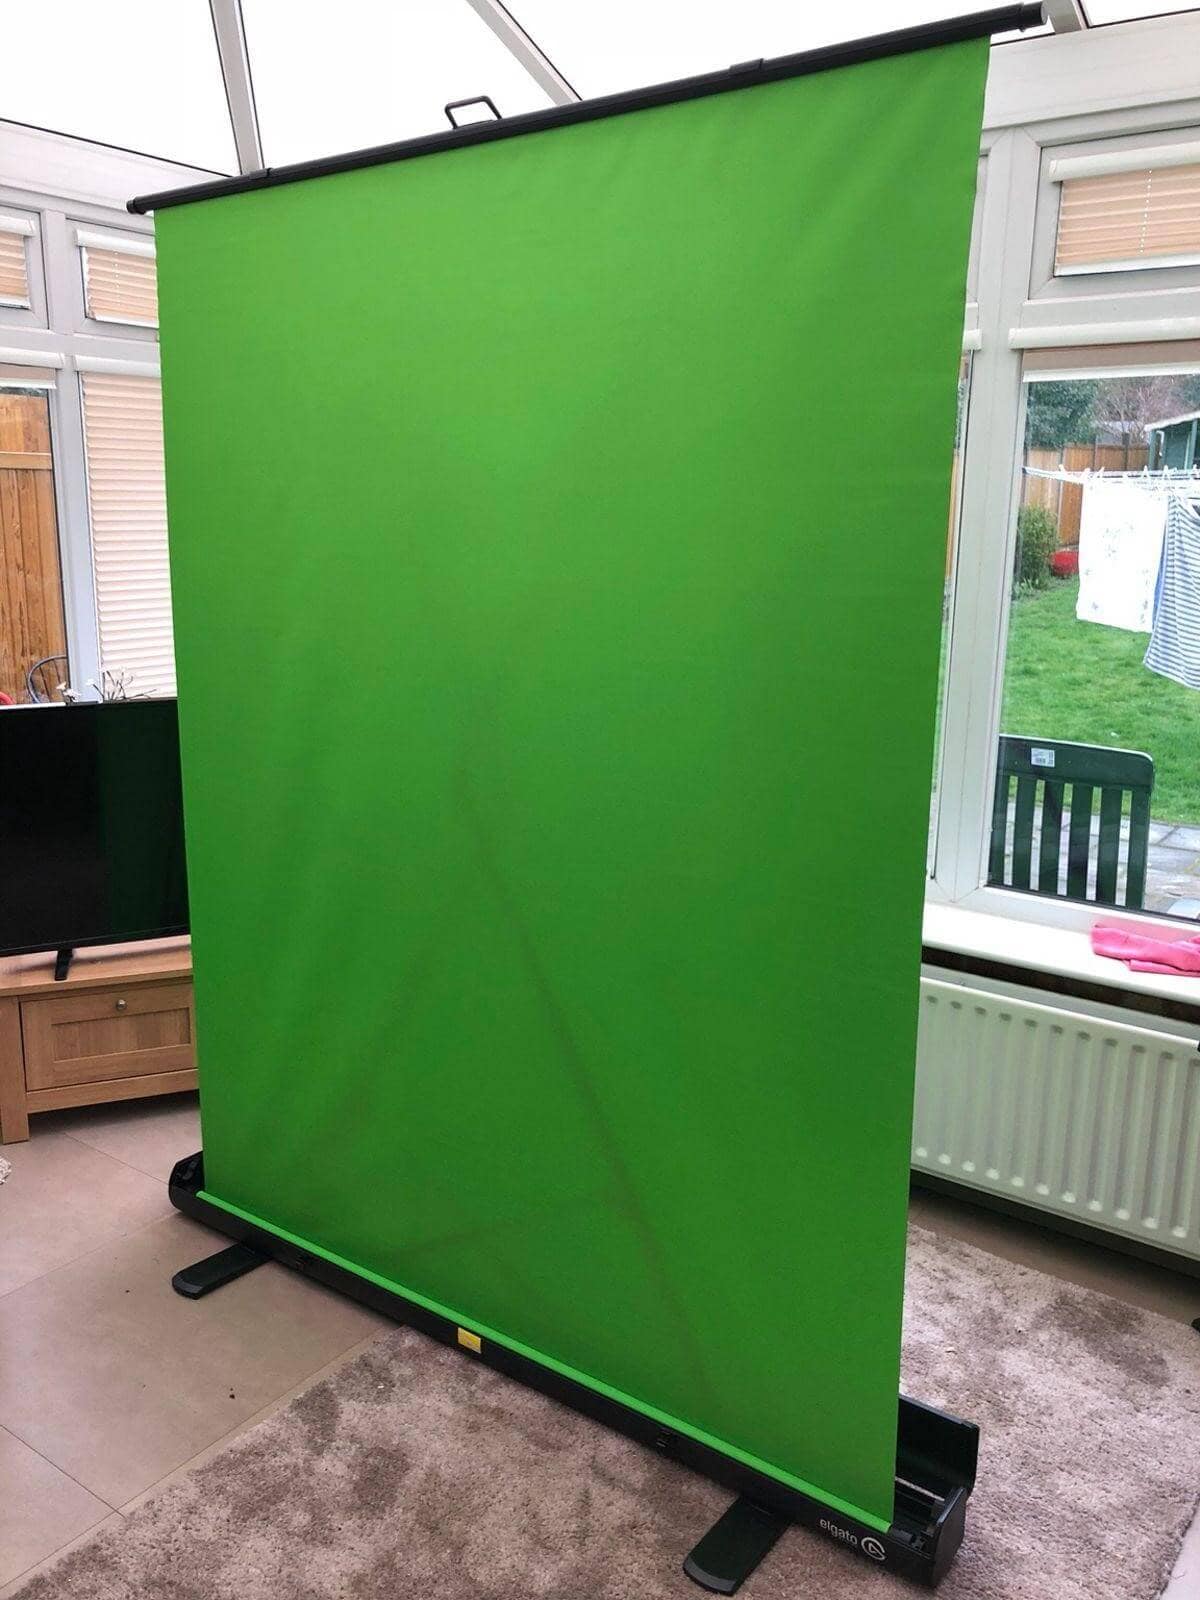
- Lights
A news broadcasting room will require a key light, fill light, and a backlight per subject so the lights should be set up accordingly. Similarly, for the green screen, enough lights should be set-up to keep the green screen evenly lit depending on the size and shape of your green screen. The number of lights will depend on the shape of your green screen rather than the size.
If it is a straight background two high-powered lights should be enough. However, if there is a curve at the corners then more lights should be added to cover the curved area.
For small setups, the most commonly used set-up is the three-point set-up. It is a formation of a triangle with a key light, fill light, and a backlight to cover the subject or the talent. For a green screen, one light on each side would do the job of providing enough light to keep the screen lit.
 WonderFox DVD Ripper Pro
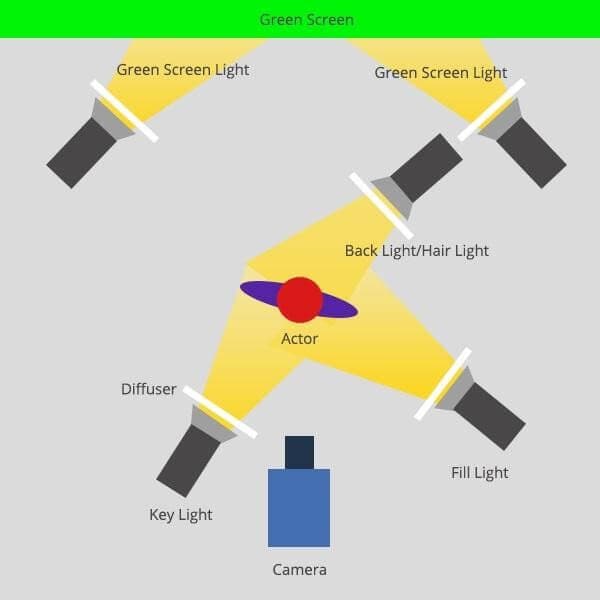
The two things to remember about lighting are that there is should be no shadow in the background and the green screen should be lit across evenly. It may take some time for you to learn the correct ways but practice and observation will make it perfect.
- Final Step
When recording and editing a video for the green screen, you can just record a video and then later edit and upload it to the internet, but for live-streaming it is different. Normal video devices do not come with video encoders. Encoders convert on-coming audio and video signals and make them web-friendly. To stream in real-time, a video encoder is really necessary.
Once your set-up is complete the next step is to choose the right software. There are a lot of options around but the best ones are Filmora X, OBS, and Adobe Premier. All of them will make it much easier to edit out any flaws in your system if you have not yet perfected it.
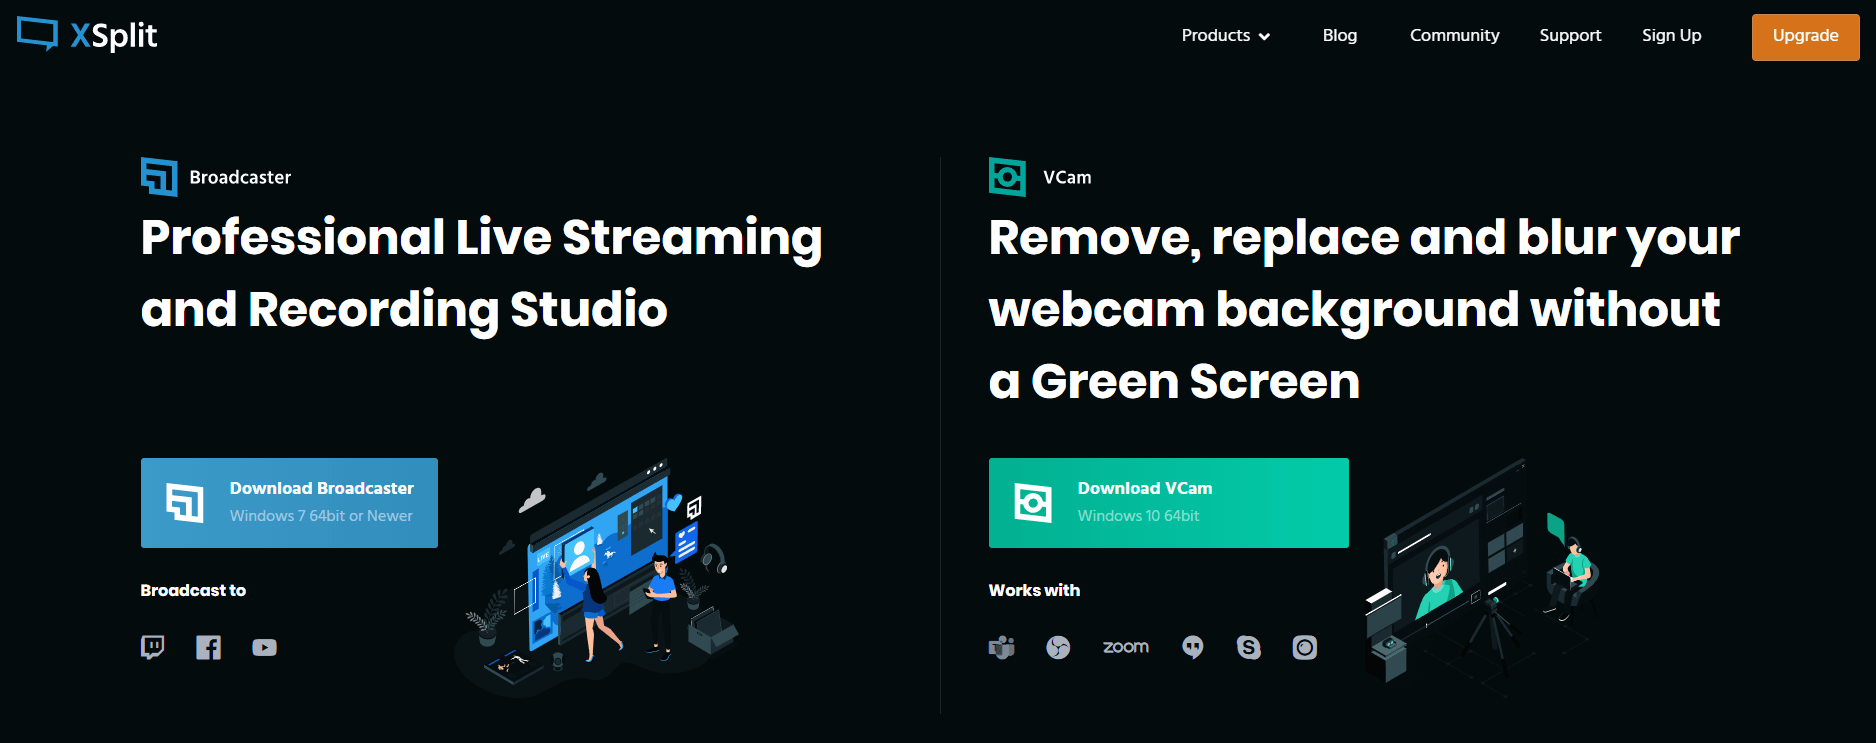
To start a live stream you need to download XSplit broadcaster software which will allow you to start your live streaming with your PC.
Conclusion
Green screens were a thing of luxury in the old times only to be used by filmmakers or news broadcasters. Now, with the current technology, it is possible to set up a green screen studio in your room. From gamers to vloggers, each one is trying to be as creative as possible to attract more viewers to the screen.
To fulfill the needs of all kinds of green screen editing for a newsroom or live video streaming, Filmora X is your partner to go with!
Learn More: How to use OBS Streamlabs on Mac?>>>


 vMix HD - Software based live production. vMix HD includes everything in vMix Basic HD plus 1000 inputs, Video List, 4 Overlay Channels, and 1 vMix Call
Richard Bennett
Richard Bennett is a writer and a lover of all things video.
Follow @Richard Bennett
Richard Bennett
Oct 26, 2023• Proven solutions
The green screen has become the new hot-cake among gamers and other video streamers. It allows them to add the most magnetizing and unreal effects for their streams. These days, it has become easier than ever to set-up your green screen studio and creatively displays your hidden talent.
How to set-up your live streaming studio
To set up a green screen studio, there are some things you’ll need to be equipped with first. You’ll need to know which camera to use, which green screen to use, and which lights your broadcast requires.
There is a wide range of set-up options depending upon your need. If you are thinking about broadcasting from a newsroom, your set-up should match the requirements when it comes to the equipment.
In a studio, the camera should be specifically for high-quality live video transmissions. Green screen size should be considerable and so should be the number of lights. In addition to all that, you will also need a crew to set up a massive studio.
For personal video streaming the equipment you need should be basic but make sure it does not lag too much behind in quality. There are a lot of selections that allow you to set up everything singlehandedly.
The details of the needed equipment for different scenarios are explained below:
- Camera
If you want to set up a large broadcasting studio the camera you’ll need should have adequate qualities. A live system studio and the broadcasting camera should do the trick if you have a sufficient budget. They can range anywhere from $2000 to $25000 depending on your need. A video with a quality of less than 2k resolution is not enough for streaming from a big newsroom studio.
For normal web or twitch streaming a high-quality webcam should be used. It should have good face tracking and great picture quality. A 1080p resolution with the capability of 30-60 frames is a bonus. There are some great cameras on the market that you can even land at under $100.
- Green Screen
The green screen requirements are also different for different types of broadcasting. A large studio will need to have a hanging green screen big enough to cover the whole studio. Make sure that you clip them tightly enough at the corners that no wrinkles are left. Also, make sure any object you want to remove from the background should be wrapped in green, for example, the legs of green screen lights,
For gamers and other streamers like beauty vloggers, twitch anchors, and YouTubers there are different kinds of green screens in the market depending on the budget. There are foldable ones that can fold into a circle like a small tent. They open up to a considerably decent size. These green screens need to be hanged to keep them standing and come at a considerably lower price range of around $40.
Another option of the green screen for streamers is a collapsible green screen. It was introduced by Elgato and is easy to carry and easy to set-up. It can be adjusted to any height and can open and tear down in a matter of seconds. It comes with a relatively high price of around $150 but they are worth the money.
Do remember that any green screen you use should be large enough to give your main subject space to move around. Apart from that, make sure you don’t have any green elements in your subject or your software will also make those areas disappear. If your subject has blonde hair, a blue screen instead of a green screen is recommended.
- Lights
A news broadcasting room will require a key light, fill light, and a backlight per subject so the lights should be set up accordingly. Similarly, for the green screen, enough lights should be set-up to keep the green screen evenly lit depending on the size and shape of your green screen. The number of lights will depend on the shape of your green screen rather than the size.
If it is a straight background two high-powered lights should be enough. However, if there is a curve at the corners then more lights should be added to cover the curved area.
For small setups, the most commonly used set-up is the three-point set-up. It is a formation of a triangle with a key light, fill light, and a backlight to cover the subject or the talent. For a green screen, one light on each side would do the job of providing enough light to keep the screen lit.
 The BootIt Collection covers multi-booting, partitioning, and disk imaging on traditional PC’s using the standard BIOS and newer PC’s using UEFI. The collection includes BootIt Bare Metal (BIBM) for standard BIOS systems and BootIt UEFI (BIU) for UEFI system.
The two things to remember about lighting are that there is should be no shadow in the background and the green screen should be lit across evenly. It may take some time for you to learn the correct ways but practice and observation will make it perfect.
- Final Step
When recording and editing a video for the green screen, you can just record a video and then later edit and upload it to the internet, but for live-streaming it is different. Normal video devices do not come with video encoders. Encoders convert on-coming audio and video signals and make them web-friendly. To stream in real-time, a video encoder is really necessary.
Once your set-up is complete the next step is to choose the right software. There are a lot of options around but the best ones are Filmora X, OBS, and Adobe Premier. All of them will make it much easier to edit out any flaws in your system if you have not yet perfected it.
To start a live stream you need to download XSplit broadcaster software which will allow you to start your live streaming with your PC.
 CalendarBudget - Monthly subscription membership to CalendarBudget via web browser or mobile app. Support included.
Conclusion
Green screens were a thing of luxury in the old times only to be used by filmmakers or news broadcasters. Now, with the current technology, it is possible to set up a green screen studio in your room. From gamers to vloggers, each one is trying to be as creative as possible to attract more viewers to the screen.
To fulfill the needs of all kinds of green screen editing for a newsroom or live video streaming, Filmora X is your partner to go with!
Learn More: How to use OBS Streamlabs on Mac?>>>
 CollageIt Pro
Richard Bennett
Richard Bennett is a writer and a lover of all things video.
Follow @Richard Bennett
Richard Bennett
Oct 26, 2023• Proven solutions
The green screen has become the new hot-cake among gamers and other video streamers. It allows them to add the most magnetizing and unreal effects for their streams. These days, it has become easier than ever to set-up your green screen studio and creatively displays your hidden talent.
How to set-up your live streaming studio
To set up a green screen studio, there are some things you’ll need to be equipped with first. You’ll need to know which camera to use, which green screen to use, and which lights your broadcast requires.
There is a wide range of set-up options depending upon your need. If you are thinking about broadcasting from a newsroom, your set-up should match the requirements when it comes to the equipment.
In a studio, the camera should be specifically for high-quality live video transmissions. Green screen size should be considerable and so should be the number of lights. In addition to all that, you will also need a crew to set up a massive studio.
For personal video streaming the equipment you need should be basic but make sure it does not lag too much behind in quality. There are a lot of selections that allow you to set up everything singlehandedly.
The details of the needed equipment for different scenarios are explained below:
- Camera
If you want to set up a large broadcasting studio the camera you’ll need should have adequate qualities. A live system studio and the broadcasting camera should do the trick if you have a sufficient budget. They can range anywhere from $2000 to $25000 depending on your need. A video with a quality of less than 2k resolution is not enough for streaming from a big newsroom studio.
For normal web or twitch streaming a high-quality webcam should be used. It should have good face tracking and great picture quality. A 1080p resolution with the capability of 30-60 frames is a bonus. There are some great cameras on the market that you can even land at under $100.
 Simple and intuitive video editing
- Green Screen
The green screen requirements are also different for different types of broadcasting. A large studio will need to have a hanging green screen big enough to cover the whole studio. Make sure that you clip them tightly enough at the corners that no wrinkles are left. Also, make sure any object you want to remove from the background should be wrapped in green, for example, the legs of green screen lights,
For gamers and other streamers like beauty vloggers, twitch anchors, and YouTubers there are different kinds of green screens in the market depending on the budget. There are foldable ones that can fold into a circle like a small tent. They open up to a considerably decent size. These green screens need to be hanged to keep them standing and come at a considerably lower price range of around $40.
Another option of the green screen for streamers is a collapsible green screen. It was introduced by Elgato and is easy to carry and easy to set-up. It can be adjusted to any height and can open and tear down in a matter of seconds. It comes with a relatively high price of around $150 but they are worth the money.
Do remember that any green screen you use should be large enough to give your main subject space to move around. Apart from that, make sure you don’t have any green elements in your subject or your software will also make those areas disappear. If your subject has blonde hair, a blue screen instead of a green screen is recommended.
- Lights
A news broadcasting room will require a key light, fill light, and a backlight per subject so the lights should be set up accordingly. Similarly, for the green screen, enough lights should be set-up to keep the green screen evenly lit depending on the size and shape of your green screen. The number of lights will depend on the shape of your green screen rather than the size.
If it is a straight background two high-powered lights should be enough. However, if there is a curve at the corners then more lights should be added to cover the curved area.
For small setups, the most commonly used set-up is the three-point set-up. It is a formation of a triangle with a key light, fill light, and a backlight to cover the subject or the talent. For a green screen, one light on each side would do the job of providing enough light to keep the screen lit.
The two things to remember about lighting are that there is should be no shadow in the background and the green screen should be lit across evenly. It may take some time for you to learn the correct ways but practice and observation will make it perfect.
- Final Step
When recording and editing a video for the green screen, you can just record a video and then later edit and upload it to the internet, but for live-streaming it is different. Normal video devices do not come with video encoders. Encoders convert on-coming audio and video signals and make them web-friendly. To stream in real-time, a video encoder is really necessary.
Once your set-up is complete the next step is to choose the right software. There are a lot of options around but the best ones are Filmora X, OBS, and Adobe Premier. All of them will make it much easier to edit out any flaws in your system if you have not yet perfected it.
To start a live stream you need to download XSplit broadcaster software which will allow you to start your live streaming with your PC.
Conclusion
Green screens were a thing of luxury in the old times only to be used by filmmakers or news broadcasters. Now, with the current technology, it is possible to set up a green screen studio in your room. From gamers to vloggers, each one is trying to be as creative as possible to attract more viewers to the screen.
To fulfill the needs of all kinds of green screen editing for a newsroom or live video streaming, Filmora X is your partner to go with!
Learn More: How to use OBS Streamlabs on Mac?>>>

Richard Bennett
Richard Bennett is a writer and a lover of all things video.
Follow @Richard Bennett
Richard Bennett
Oct 26, 2023• Proven solutions
The green screen has become the new hot-cake among gamers and other video streamers. It allows them to add the most magnetizing and unreal effects for their streams. These days, it has become easier than ever to set-up your green screen studio and creatively displays your hidden talent.

How to set-up your live streaming studio
To set up a green screen studio, there are some things you’ll need to be equipped with first. You’ll need to know which camera to use, which green screen to use, and which lights your broadcast requires.
There is a wide range of set-up options depending upon your need. If you are thinking about broadcasting from a newsroom, your set-up should match the requirements when it comes to the equipment.
In a studio, the camera should be specifically for high-quality live video transmissions. Green screen size should be considerable and so should be the number of lights. In addition to all that, you will also need a crew to set up a massive studio.
For personal video streaming the equipment you need should be basic but make sure it does not lag too much behind in quality. There are a lot of selections that allow you to set up everything singlehandedly.
The details of the needed equipment for different scenarios are explained below:
- Camera
If you want to set up a large broadcasting studio the camera you’ll need should have adequate qualities. A live system studio and the broadcasting camera should do the trick if you have a sufficient budget. They can range anywhere from $2000 to $25000 depending on your need. A video with a quality of less than 2k resolution is not enough for streaming from a big newsroom studio.
For normal web or twitch streaming a high-quality webcam should be used. It should have good face tracking and great picture quality. A 1080p resolution with the capability of 30-60 frames is a bonus. There are some great cameras on the market that you can even land at under $100.

- Green Screen
The green screen requirements are also different for different types of broadcasting. A large studio will need to have a hanging green screen big enough to cover the whole studio. Make sure that you clip them tightly enough at the corners that no wrinkles are left. Also, make sure any object you want to remove from the background should be wrapped in green, for example, the legs of green screen lights,
For gamers and other streamers like beauty vloggers, twitch anchors, and YouTubers there are different kinds of green screens in the market depending on the budget. There are foldable ones that can fold into a circle like a small tent. They open up to a considerably decent size. These green screens need to be hanged to keep them standing and come at a considerably lower price range of around $40.
Another option of the green screen for streamers is a collapsible green screen. It was introduced by Elgato and is easy to carry and easy to set-up. It can be adjusted to any height and can open and tear down in a matter of seconds. It comes with a relatively high price of around $150 but they are worth the money.
Do remember that any green screen you use should be large enough to give your main subject space to move around. Apart from that, make sure you don’t have any green elements in your subject or your software will also make those areas disappear. If your subject has blonde hair, a blue screen instead of a green screen is recommended.

- Lights
A news broadcasting room will require a key light, fill light, and a backlight per subject so the lights should be set up accordingly. Similarly, for the green screen, enough lights should be set-up to keep the green screen evenly lit depending on the size and shape of your green screen. The number of lights will depend on the shape of your green screen rather than the size.
If it is a straight background two high-powered lights should be enough. However, if there is a curve at the corners then more lights should be added to cover the curved area.
For small setups, the most commonly used set-up is the three-point set-up. It is a formation of a triangle with a key light, fill light, and a backlight to cover the subject or the talent. For a green screen, one light on each side would do the job of providing enough light to keep the screen lit.
The two things to remember about lighting are that there is should be no shadow in the background and the green screen should be lit across evenly. It may take some time for you to learn the correct ways but practice and observation will make it perfect.
- Final Step
When recording and editing a video for the green screen, you can just record a video and then later edit and upload it to the internet, but for live-streaming it is different. Normal video devices do not come with video encoders. Encoders convert on-coming audio and video signals and make them web-friendly. To stream in real-time, a video encoder is really necessary.
Once your set-up is complete the next step is to choose the right software. There are a lot of options around but the best ones are Filmora X, OBS, and Adobe Premier. All of them will make it much easier to edit out any flaws in your system if you have not yet perfected it.
To start a live stream you need to download XSplit broadcaster software which will allow you to start your live streaming with your PC.
Conclusion
Green screens were a thing of luxury in the old times only to be used by filmmakers or news broadcasters. Now, with the current technology, it is possible to set up a green screen studio in your room. From gamers to vloggers, each one is trying to be as creative as possible to attract more viewers to the screen.
To fulfill the needs of all kinds of green screen editing for a newsroom or live video streaming, Filmora X is your partner to go with!
Learn More: How to use OBS Streamlabs on Mac?>>>
Richard Bennett
Richard Bennett is a writer and a lover of all things video.
Follow @Richard Bennett
- Title: Enhancing Webcasts with Dynamic Background Transitions
- Author: Christopher
- Created at : 2024-07-22 10:08:39
- Updated at : 2024-07-23 10:08:39
- Link: https://extra-hints.techidaily.com/enhancing-webcasts-with-dynamic-background-transitions/
- License: This work is licensed under CC BY-NC-SA 4.0.